|
| |

 |


|
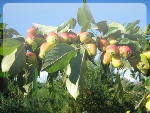
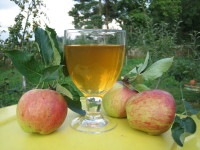
Make your juice
First, make some apple juice from fresh apples. Then, put the juice into a container with an air lock such as a demijohn or, as we do, a 25 litre plastic tank with a hole the size of the air lock bung cut in the screw top and an air lock fitted.
Any container you use should be thoroughly clean before being used for cider, washing in stelising solution and rinsing with clean water will do the trick. If it's not clean, you'll probably end up with vinegar rather than cider. The air lock must also be sterilised and the bung must be a tight fit or else fruit flies will get in and again you'll have vinegar instead of cider.
|

Leave your container(s) to ferment
The apples have naturally occurring yeasts on their skin, so there is no need to add any yeast to start the juice fermenting. Depending how warm the juice is will depend how quickly it will ferment - in a warm place it will start quicker and will be more vigourous. You can tell when fermentation starts as the air lock bubbles, and when the bubbling stops, it has stopped fermenting. Again, depending how warm the juice is will determine how quickly it will stop fermenting.
For those of you who like to know the science behind things, fermentation is the reaction of the yeast turning sugar in to alcohol. The more sugar in the apple juice, the longer it will take to ferment and the stronger alcohol it wil be. You can guage the alcohol content by measuring the sugar in the unfermented juice with a hydrometer.
|

Be patient!
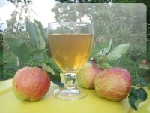
When your juice has finished fermenting, it is now cider - alcoholic apple juice. But, it will be rough, so don't be in too much of a hurry to drink it too soon! It needs time to mature and mellow and to a point, the longer you can wait, the better it will taste.
To give you an idea of timescales, if you make it in October, it will be alcohol by Christmas, palatable by Easter and drinkable by summer. However, it's always good to sample it now and then, so take a turkey baster full out of the top, don't tip the container up or all the dead yeast that has settled at the bottom will get mixed in again. And make sure the turkey baster is sterilised so you don't turn your cider in to vinegar.
|
Ready to Drink
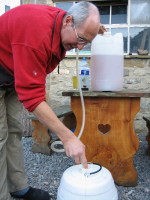
The long wait is finally over, your cider is ready to drink - well almost. First you need to 'rack it off'. This means transferring the liquid from the fermenting container in to a clean container, leaving the dead yeast and other yukky bits behind (proper word for it is sedement).
To do this, you need a piece of flexible plastic tube and another container the same size as your fermenting container - both sterilised and rinsed of course.
Put the container with the cider higher than the new container, on a table for example, and the new container below.
Carefully put the plastic tube in to the cider, about half way down to start with, taking care not to stir the liquid. You want to avoid picking up any of the sedement.
Now, suck on the end of the tube until cider comes out and drop the tube in to the new container. Gravity will keep the liquid flowing, all you need to do is lower the tube in to the liquid as the level falls and quickly pull it out as soon as any sedement starts to be drawn in.
You should now have a chrystal clear container of homemade cider!
|
Getting to Perfection and a Secondary Fermentation
As we all know, apples can be sweet, tart, and a whole range inbetween, and this will have an effect on the taste of the cider. Because all of the sugar has been fermented out of the juice, it can often taste dry. We like ours a bit sweeter and with a bit of fizz, so we add a bit more sugar to start it fermenting again.
To do this, you must use an air lock again or a plastic bottle - there's potential for explosion if a sealed glass botle is used! Using a plastic bottle is a good way of knowing when the cider is ready - it will go drum hard with pressure, just like carbonated drinks do.
Add some sugar to the newly racked off cider - in our tests about 20g of brown sugar per litre is right.
Give it a shake.
Leave in a warm place for about a week, shaking for the first couple of days if the sugar hasn't dissolved.
If you leave it too long, the sugar will ferment out again and the cider will be as dry as before, just an even higher alcohol content.
|
|
|
|
|
|
|
|
|
|
|